.png)
The Easy-to-sew Project Bag perfect for Crocheters and Knitters
- Nichole Jensen
- May 18, 2024
- 6 min read

If you crochet or knit, the need for a project bag is REAL. Most of us have at least a few projects going at any given time and if you’re like me, as soon as I set one down, I forget all of those important details I just KNEW I would remember when I picked it back up again.
This easy-to-sew project bag is large enough to hold a few balls of yarn or even full skeins, a printed pattern and any odds and ends you need for the project. My favorite part though is what is on the outside of the bag – a small pocket just big enough to hold a Work In Progress (WIP) card.
These cards have lines to record all the important details and you can see it all at a glance. No need to rifle around at the bottom of bag. No more wondering what the heck hook or needle you were using, or what color yarn you started with (because the label is long gone), or where you found the pattern.
The bag will sit up by itself and you can store them on a shelf, file box or tote. And since the WIP cards is on the outside edge, you can see what project is in each one without even shuffling them around.
Plus, this bag is quick and easy to make. If you can sew a straight line, you can make these bags, I promise. Make a bunch so you can have a whole pile ready to go when you want to start work on that second, third or fourth project. Or give a pile to a friend who crochets or knits and be their crafty hero.
You can even print free WIP cards at the link down below that will fit perfectly in the pocket on the bag. Let's get started!
Watch the video tutorial here:
Supplies:
This post may contain affiliate links which means at no extra cost to you I may receive a commission if you decide to make a purchase through my links.
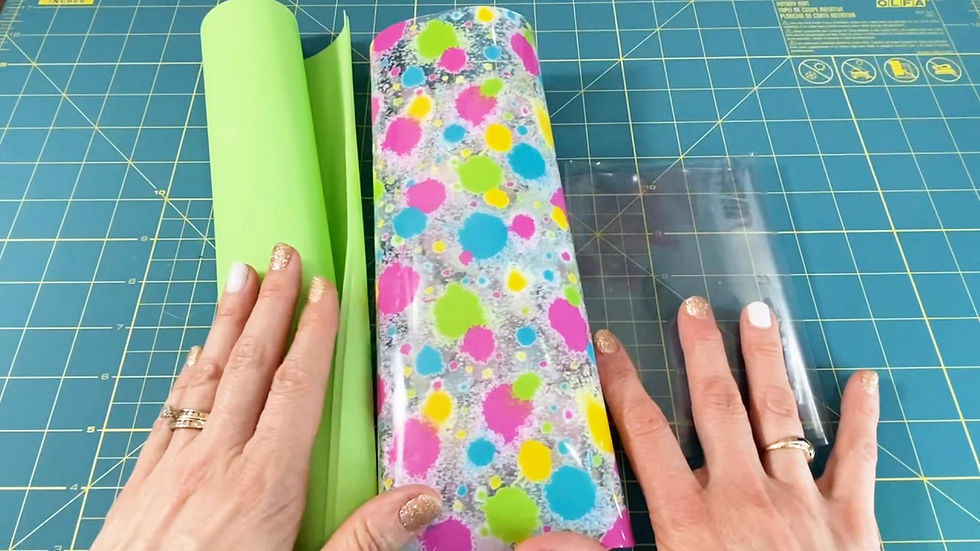
Vinyl, jelly vinyl, TPU vinyl, 12-gauge clear vinyl – whatever you want to use. I bought the green jelly vinyl and patterned TPU vinyl here. Cut two pieces of vinyl to 12 ½ inches wide x 10 ½ inches tall.
Clear 12-gauge vinyl – for the WIP pocket on the front. Cut one piece that is 2 ½ inches wide x 3 ¾ inches tall.
Masking tape to hold the clear vinyl in place while you sew it on.
Small piece of coordinating/matching cotton fabric to make zipper tabs. Each bag needs two pieces cut to 2 inches x 2 inches.
Free printable Work In Progress (WIP) cards - these work best if printed on cardstock
Sewing clips – You need clips and not pins because any hole you put into your vinyl will not “heal” and will live on forever.
Iron and ironing board
Sewing machine and matching all-purpose thread
Optional:
Zipper foot
A non-stick foot - I highly recommend . They are fairly inexpensive and make sewing any vinyl so much easier. I found one for my sewing machine here: www.sewingpartsonline.com
Blow dryer - heating up the vinyl makes it easier to turn right side out after you sew it together and can be used to quickly get out any vinyl wrinkles.
Get the project bag zipper ready:

Time to make the zipper tabs. These make the finished bag look very polished.
Fold the piece of cotton fabric cut to 2 x 2 inches in half and iron flat.
Open the folded fabric and fold one of the long sides up to meet the crease you ironed and iron that side.
Fold the remaining long side up to meet the center crease and iron.
Fold the entire thing in half along the center crease and iron again. Repeat this process for the other piece of fabric.

Now, making sure the zipper pull is in toward the center of the zipper, cut off the stops at both ends making the entire zipper 11 ½- inches long.

Place each end of the zipper into one of the zipper tabs you have ironed so it is flush with the center crease and clip in place.

Take it to your sewing machine and sew the fabric to the zipper with a 1/8-inch seam allowance. Make sure to catch both the edges of the fabric on the front and back of the zipper.

Trim the excess fabric with fabric scissors so the edges of the fabric are the same as the edges of the zipper.

Fold the zipper in half the long way to find the center and mark it with a fabric marker or pencil.
Adding a pocket to the project bag:

Now let’s attach the pocket to the front of the vinyl.
Place the clear vinyl pocket piece on the front of one of the panels of bag vinyl. Use masking tape to adhere it 1 ¾ inches from the right side of the vinyl and 1 inch down from the top of the vinyl.
Sew around the sides and bottom of the pocket as close to the edge of the clear vinyl as you can removing tape as you go and don’t forget to backstitch at the start and end. Leave the top edge unsewn.
Sew the zipper onto the project bag:

Fold the vinyl with the pocket attached in half to find the center and mark it by making the tiniest of clips at the top.

Place the vinyl right side up and your zipper right side down on top, matching up the top edges and the center marks. Clip in place. I like the put to put the zipper pull on the left side, but this is just personal preference.
If you have a zipper foot, now is the time to use it.

Sew along the clipped edge as close to the zipper as you can.

Fold the zipper toward the back of the fabric so you can see the edge you just sewed through the front of the vinyl and finger press it in place.
Switch to your non-stick foot if you have it.
Top stitch just below the seam you just made with an 1/8-inch seam allowance.
Switch back to your zipper foot.

Place the vinyl with the zipper attached right side up and the second piece of vinyl right side down on top of it. Line up the remaining edge of the zipper with the top edge of the vinyl. Also line up the outside edges of both pieces of vinyl so everything is straight and centered. Clip in place.
Sew along the clipped edge as close to the zipper as you can.

Fold the zipper toward the back of the fabric so you can see the edge you just sewed through the front of the vinyl and finger press it in place.
Switch to your non-stick foot if you have it (last time, I promise).
Top stitch just below the seam you just made with an 1/8-inch seam allowance.

At this point, unzip the bag from the inside about ¾ the way. Don’t forget this step because it’s a pain to deal with later if you don't.
With the right sides of the fabric still together, take the whole thing to the sewing machine and, starting at the upper right corner, sew as close to BUT NOT ON TOP OF the zipper tab as possible. Continue with a 1/4-inch seam allowance down the right side, across the bottom and up to the top of the left side (once again sewing as close to the zipper tab as possible but not on top of it).
Box the corners of the project bag:

You can go here to watch a video tutorial for boxing corners.
At the bottom corners of the vinyl, measure a 1 x 1 inch square FROM THE TWO STITCH LINES, not the edge of the fabric, and mark with a Sharpie.

Use fabric scissors to cut out this square making sure to cut just outside the Sharpie line so you remove it. You don’t want to see the line you drew after sewing.

Open each corner, center and line up the two seams, and “nest” them together so one seam is going to the left, and one to the right.
Clip this in place and then sew across this corner with a ¼-inch seam allowance.
Because vinyl is stiffer and seams have more of a tendency to stretch, I like to sew another seam just to the left of this one. This reinforces it.

Once you have both corners boxed, flip the whole thing right side out through the open zipper. This can be tricky since the vinyl will stick to itself and is stiff. If you use a blow dryer to just gently warm it this process will be much easier.
Push all of the corners and the zipper tabs to the outside and gently heat the whole thing with the blow dryer again to remove any wrinkles.
Are you ready to make a whole pile of these bags to hold projects? They are so fun and so very useful.
Click the link below to receive the free WIP cards!

Happy crafting!


Comments